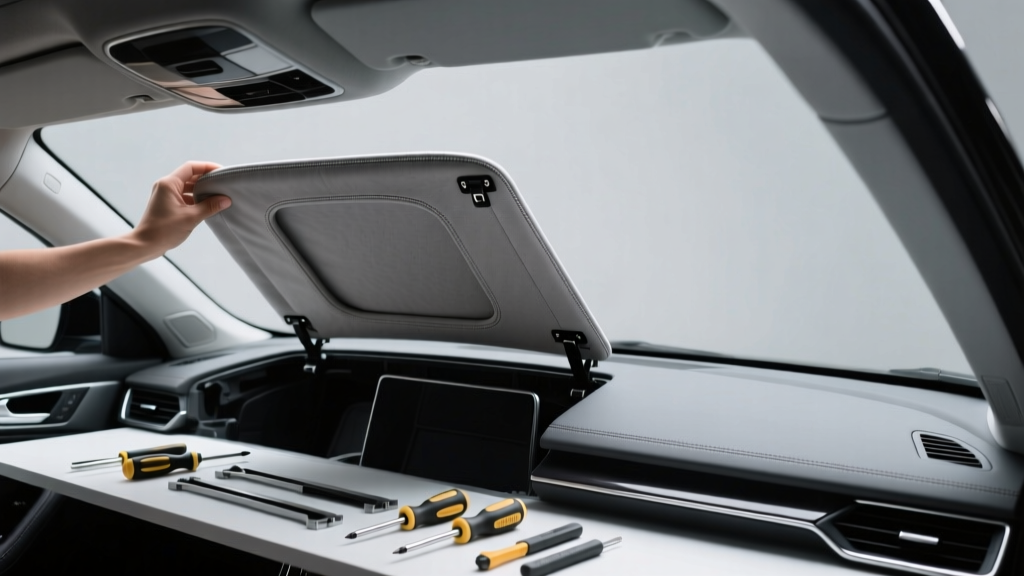
Headliner Replacement: Step-by-Step Installation (2026)
A sagging, stained, or torn headliner can make an otherwise clean car feel tired fast. It?s also one of those interior problems you notice every time you get in?especially when the fabric starts drooping near your rearview mirror, brushing your hair, or shedding foam ?dust? onto the seats. Beyond looks, a failing headliner can rattle, interfere with visor operation, and even block your view if it drops far enough.
The good news: headliner replacement is absolutely doable for many car owners with basic tools and patience. The job is less about raw mechanical skill and more about careful trim removal, prepping surfaces correctly, and using the right adhesive. This guide walks you through the process step-by-step, explains what to buy, highlights common mistakes, and helps you decide whether to replace the fabric only or install a complete headliner board.
What a Headliner Is (and Why It Fails)
Your car?s headliner is the fabric-covered panel attached to the roof interior. In most vehicles, it?s a molded fiberglass or compressed fiber board wrapped in foam-backed fabric. Over time, heat and humidity break down the foam layer and the glue that holds it together. Once the foam degrades, the fabric can?t stay bonded?so it sags.
Common causes of headliner failure
- Heat exposure: Sun-baked roofs accelerate glue and foam breakdown.
- Age: Many headliners fail between 8?15 years depending on climate.
- Moisture leaks: Sunroof drains, windshield seals, or roof antenna gaskets can stain and weaken the board.
- Smoking/vaping residue: Can discolor fabric and reduce adhesion.
- Previous ?patch? repairs: Thumbtacks, spray glue touch-ups, and tape often make the final repair harder.
Replacement Options: Fabric Re-wrap vs. Full Assembly
Before you start, decide which approach matches your budget, time, and how damaged your headliner board is.
Option A: Re-wrap your existing headliner board (most common DIY)
- Pros: Cost-effective, color/material choices, OEM-like results if done carefully.
- Cons: Requires cleaning off old foam and careful gluing.
- Best for: Sagging fabric with an intact board.
Option B: Buy a complete headliner board/assembly (vehicle-specific)
- Pros: Faster, less mess, fewer chances to ruin a board.
- Cons: More expensive, shipping can be costly due to size, fitment varies.
- Best for: Cracked, warped, or water-damaged boards.
Option C: ?Quick fixes? (not recommended for long-term)
- Headliner pins/twist fasteners
- Localized spray adhesive touch-ups
- Double-sided tape
These can buy time, but they usually telegraph through the fabric, leave wrinkles, and often fail again?especially in hot weather.
Tools and Materials Checklist
Having the right supplies makes the job smoother and helps avoid rework.
Tools
- Trim removal tools (plastic pry tools)
- Phillips/flathead screwdrivers
- Torx drivers (common sizes: T20, T25, T30)
- Ratchet and sockets (commonly 8mm, 10mm)
- Pick tool (for clips and small covers)
- Utility knife or sharp scissors
- Wire brush (hand brush) and/or stiff nylon brush
- Shop vacuum
- Masking tape and a marker (label connectors and screws)
Materials
- Headliner fabric: Foam-backed automotive headliner fabric (typically 1/8" foam). Buy extra for mistakes and sun visors if you plan to wrap them.
- High-temperature headliner adhesive: Spray adhesive rated for automotive heat (very important).
- Drop cloth or plastic sheeting (adhesive overspray)
- Nitrile gloves, safety glasses, and a respirator or mask rated for fumes
Product recommendations (what to look for)
Adhesive choice can make or break the job. You want a high-heat, trim/headliner-specific spray adhesive.
- 3M Headliner & Fabric Adhesive (High Strength): Well-known, strong hold, easy to find. Great for most daily drivers.
- Permatex Heavy Duty Headliner & Carpet Adhesive: Strong bond and good heat resistance; solid DIY option.
- 3M Super 90 vs. Super 77: Super 90 is generally better for headliners than Super 77. Super 77 can soften in heat and re-sag in hot climates.
Fabric tip: Choose automotive headliner fabric, not generic craft felt. Automotive fabric stretches slightly, lays smoother, and is designed for interior temps.
Before You Begin: Safety, Workspace, and Planning
- Work in a ventilated area: Adhesive fumes are no joke. Open doors/garage and use fans if possible.
- Pick a warm, dry day: Adhesives cure best in moderate temperatures and low humidity.
- Protect the interior: Cover seats, dash, and carpet to avoid foam debris and overspray.
- Disconnect the battery: If you?ll remove A-/B-/C-pillar trims near airbags, disconnect the negative terminal and wait 10?15 minutes before working.
Step-by-Step Headliner Replacement Installation Guide
Step 1: Document and label everything
Take quick photos as you go. It?s especially helpful for clip locations, wiring routes, and the orientation of trim pieces.
- Label connectors for dome lights, microphones, and sunroof switches
- Keep screws in small bags labeled by component (visors, grab handles, pillar trims)
Step 2: Remove trim pieces that trap the headliner
Most headliners come out after removing a series of interior parts. The exact order varies by vehicle, but this sequence works for many cars:
- Sun visors and visor clips: Usually Phillips or Torx screws; unplug illuminated visor wiring if equipped.
- Overhead console: Pry carefully; disconnect wiring harnesses.
- Dome/map lights: Pop lens covers gently; remove screws and unplug.
- Grab handles: Flip open screw covers and remove bolts/screws.
- A-/B-/C-pillar trim: Carefully release clips. If side curtain airbags are behind the trim, do not poke or tug aggressively.
- Weatherstrip edges (door seals): Often need to be pulled back slightly to free edges.
Real-world example: On many Hondas and Toyotas, the B-pillar upper trim overlaps the headliner edge. You don?t always need to remove the entire pillar trim?sometimes loosening the top portion is enough to slide the headliner out.
Step 3: Lower the headliner board and remove it from the vehicle
Once all perimeter trims and attachments are off, the headliner board will drop slightly.
- Recheck for hidden fasteners near the rear dome light or coat hooks
- Support the board to prevent bending or cracking
- Remove through the largest opening: typically the hatch (SUV), rear door (sedan), or passenger door with seats reclined
Tip: If the board barely fits, don?t force it. Remove front seats or tilt them back more, and rotate the board carefully. Creasing a headliner board can permanently telegraph through the finished fabric.
Step 4: Peel off the old fabric and prep the board
Pull the sagging fabric away. Most of the foam will remain stuck to the board as a crumbly layer.
- Peel fabric off slowly to avoid tearing chunks of the board
- Brush off old foam with a nylon brush or wire brush (use light pressure)
- Vacuum the surface thoroughly
The goal is a clean, dry surface. If you leave old foam behind, new adhesive sticks to the foam instead of the board?and the headliner can sag again.
Step 5: Test-fit and cut the new headliner fabric
- Lay fabric over the board with foam side down
- Center it so you have extra material on all sides (2?4 inches is ideal)
- Don?t cut holes yet?save that for after bonding
Step 6: Apply adhesive correctly (this is where most DIY jobs go wrong)
Follow the adhesive can instructions for spray distance and tack time. In general:
- Fold half the fabric back (like opening a book)
- Spray adhesive on the board half and the corresponding fabric foam backing
- Wait the recommended tack time (often 30 seconds to a few minutes)
- Lay the fabric down gently, starting from the center and working outward
- Repeat for the other half
Practical tip: Use your hands or a clean, soft plastic spreader to smooth the fabric. Avoid hard rollers that can crush foam or leave lines. Work slowly around contours and recesses (sunroof openings, dome light pockets) to prevent wrinkles.
Step 7: Wrap edges and cut openings
Once the face is bonded smoothly:
- Flip the board and apply adhesive to the perimeter on the back side
- Wrap the extra fabric around the edges and press firmly
- Cut relief slits on curves so the fabric lays flat (small cuts, spaced out)
For holes (lights, visors, clips):
- Locate openings by feel from the front
- Make a small X-shaped cut in the center
- Trim gradually, leaving enough material to wrap slightly into the opening for a clean edge
Step 8: Let adhesive cure
Most adhesives bond quickly, but curing time matters for heat resistance. If possible, let the headliner sit flat for a few hours (or overnight) before reinstalling. This reduces the chance of corners lifting during installation.
Step 9: Reinstall the headliner board
- Bring the board back into the cabin carefully (get help if needed)
- Raise it into position and loosely align it
- Reconnect wiring (dome lights, console, microphones)
- Install key components that ?hold? the headliner first (overhead console, visors, grab handles)
- Reinstall pillar trims and weatherstripping last
Tip: Start screws by hand to avoid cross-threading. If something doesn?t line up, don?t force it?check whether the headliner board shifted.
Step 10: Final checks
- Verify all lights and switches work
- Confirm visors swing freely and clips hold properly
- Check for loose trim clips or rattles
- Look for any lifting at edges and press firmly if needed
Common Mistakes to Avoid
- Using low-temp craft adhesive: It may look fine at first, then sag the first hot day.
- Skipping foam removal: New glue on old foam is a recipe for failure.
- Spraying too much adhesive: Oversaturation can bleed through fabric or create lumps.
- Not waiting for tack time: If you bond while wet, the fabric can slide and wrinkle.
- Stretching fabric too hard: Overstretching can thin the foam and cause uneven texture.
- Rushing cuts for openings: Big cuts are hard to hide. Start small and trim gradually.
- Forgetting airbag precautions: Be careful around A-/B-/C-pillars; disconnect the battery when needed.
Pro Tips for an OEM-Looking Finish
- Choose the right color and texture: Light gray and beige headliners show glue stains more easily than charcoal/black.
- Clean hands/gloves: Adhesive transfers quickly and can stain fabric.
- Work from the center out: This reduces trapped air and wrinkles.
- Plan for sunroof headliners: Sunroof panels and sliding shades may need separate fabric and careful trimming.
- Replace broken clips: Loose trim can cause rattles that you?ll notice immediately after reinstall.
FAQ: Headliner Replacement
How much does headliner replacement cost?
DIY typically runs $60?$200 for fabric and adhesive, depending on vehicle size and material choice. Professional replacement often ranges from $250?$600+, and more for vehicles with sunroofs, complex consoles, or specialty materials.
Can I glue my headliner back up without replacing the fabric?
If the foam is breaking down (most sagging headliners), re-gluing usually doesn?t last. The adhesive sticks to failing foam, not a solid surface. If you want a durable fix, remove the fabric, clean the board, and re-wrap.
What adhesive works best for headliners in hot climates?
Look for high-temperature headliner adhesive specifically labeled for automotive interiors. Many DIYers have better long-term results with stronger, higher-heat formulas (often marketed as headliner/fabric or heavy-duty trim adhesive). Avoid general-purpose spray glue for vehicles that live outdoors.
Do I need to remove the windshield to replace the headliner?
Almost never. The headliner board typically exits through a door or hatch. The challenge is maneuvering it without bending?reclining seats or removing a seat can create the clearance you need.
How long does a DIY headliner replacement take?
Plan on 4?10 hours depending on your experience, vehicle complexity, and cure time. A first-timer often does it over a weekend to avoid rushing the adhesive steps.
My headliner board is cracked?can I still re-wrap it?
Sometimes. Small cracks can be repaired with fiberglass repair mesh/tape and resin or reinforced on the back with thin material and adhesive. If the board is severely warped or waterlogged, replacing the board/assembly is usually the better route.
Wrap-Up and Next Steps
If your headliner is sagging, resist the temptation to pin it up and forget it. A proper replacement restores the cabin?s look, reduces mess from crumbling foam, and can make an older vehicle feel well cared for again. Your best results come from three things: thorough surface prep, high-temperature adhesive, and patient smoothing and trimming.
Next steps:
- Confirm whether your board is reusable or needs replacement
- Order foam-backed headliner fabric plus extra for margins
- Choose a proven high-heat adhesive and set aside a ventilated workday
- Take photos during disassembly so reassembly is stress-free
For more practical car interior DIYs, cleaning tips, and trim repair guides, explore the latest articles on carinteriormix.com.